How to Setup and Use the T660 Material Moisture Measuring Device IC-T660

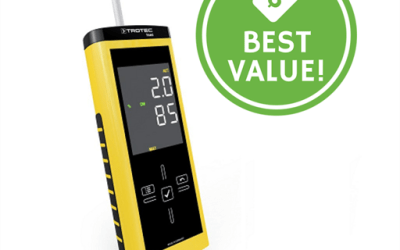
The IC-T660 is a portable moisture sensor for the quick and non-destructive determination of near-surface moisture distributions in various building materials. This meter allows you to choose between screed and cement measurement modes and have the results displayed in either volume mass percentage or carbide method percentage. For all other building materials, this meter features a reference scale from 0-100. The IC-T660 is straightforward to set up and takes measurements of moisture in various building materials.
Figure 1 Watch an Instrument ChoiceScientist demonstrate how to set up and use the T660 Material Moisture Measuring Device IC-T660 here.
How to Setup and Use the T660 Material Moisture Sensor Device IC-T660
- Turn the unit on by pressing the power key. As it turns on, it will complete a self-calibration as indicated by ‘CAL’ flashing on the screen. While it calibrates, hold the meter away from your body or any other moisture sources that may falsify the calibration. Once the calibration is complete, the meter will enter measurement mode and is ready for set up and operation.
- There are four configuration options on the IC-T660. You can adjust;
- Screen brightness
- Measured materials
- Alarms
- The calibration offset
Screen Brightness
- To enter the menu, press and briefly hold the left menu key. ‘CFG’ in the top corner signifies configuration mode.
- Press the centre ‘accept’ key to enter into the brightness adjustment setting mode.
- Press the up and down selection buttons to adjust the screen brightness. The display will change as you move through the selections.
- Once you have landed on the desired brightness setting, press and hold the enter key again, the unit briefly shows your selection then returns to measurement mode.
Measured Material Setting
- Press and hold the menu key to re-enter the menu—this time, scroll across to ‘MAT’ by pressing the down selection arrow once.
- Press the centre key when ‘MAT’ is flashing to enter into the material selection.
- Use the up and down selection to choose between the following three choices;
- 0 no: No material selected (Reference scale only, use this for building materials).
- 1 An: The chosen material is anhydrite screed and grouts.
- 2 Ce: Is for use with cementitious screed.
- Press enter to accept the desired setting.
- In the concrete measurement mode, there are two settings. When ‘CM’ displays on the screen, it is utilising the calcium carbide method. When CM is absent from the screen, the device is using the volume mass method.
Alarms
- Press and briefly hold the menu key to enter the menu. Then press the down selection until ‘ALARM’ starts to blink.
- Press and hold the accept key to enter into alarm adjustment.
- There are two selections here;
- Turning the alarm on/off,
- Setting the alarm.
- The blinking value is the value to be adjusted, so first use the up and down selectors to turn the alarm on or off.
- If on, press the left arrow to move across the digits until you get to the alarm adjustment. Press up and down to adjust each number and left or right to move onto the next.
- Once the alarm limit is selected, press the enter key to accept and return to measurement mode. If the alarm is on, an audible alarm will sound whenever your entered value is exceeded.
Calibration Offset
- Enter the menu again by pressing and holding the menu key.
- This time pressing down twice until ‘ALARM’ starts blinking and up one time until ‘CAL’ starts to flash.
- Press the accept key to enter into calibration offset configuration.
- As with the alarms, there are two options. First, press the up and down keys to turn the offset on or off.
- Then use the left and right selection keys to move across each of the four digits to enter a calibration offset.
- Press accept to save and return to measurement mode.
Conclusion
The IC-T660 Material moisture sensor is a professional hand-held device for the quick, non-destructive determination of moisture distributions in near-surface areas. The meter’s design is for the accurate determination of moisture in various building materials. It’s portable and straightforward to use.
For more information on this or other building moisture sensors, see the links below or contact us!
Additional links
- View the full IC-T660 Moisture sensor features and specifications here.
- View our extensive range of building moisture sensors.
- Watch How to Set up and Use the T660 Material Moisture Sensor IC-T660 again.
- Want to know what comes in the box? Watch an Instrument Choice scientist Unboxing the Trotec T660 Material Moisture Sensor (IC-T660)
Also interesting
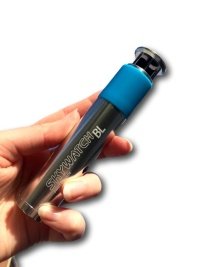
The BL500 is a complete portable weather station that fits conveniently into your pocket. The station connects to your smartphone via Bluetooth wireless technology and instantaneously measures and displays wind speed, wind direction, temperature, wind chill, heat index, humidity, dew point, pressure and UV index measurements.
The IC-BL-500 is the ideal portable weather station for all outdoor activities, including; leisure activities such as hiking, kayaking, and sailing. This station is also an appropriate tool in professional operations, such as on construction sites.

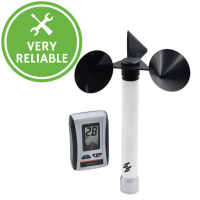
The IC-WR-3 is an accurate, long-range, and portable wireless anemometer, suited for both permanent and temporary installations. The sensor sends data to the display unit every two seconds so that you will have instantaneous wind speed readings within a 400m radius from the sensor.
The IC-WR-3 is versatile and ideal for use in applications such as determining wind speed in the vicinity of cranes and lifting equipment, construction sites, outdoor venues, marine applications, as well as various applications in agriculture.


