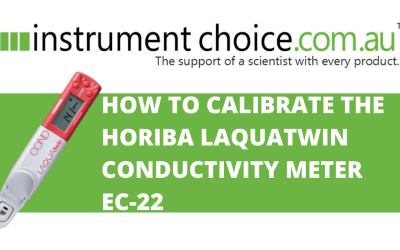
How to Calibrate the Horiba Laquatwin Conductivity Meter EC-22

Rainwater conductivity is a trusted guide in determining atmospheric purity. In agriculture, measuring the conductivity of soil allows farmers and agronomists to determine optimum fertiliser usage as well as check the health of soils.
The LAQUAtwin meter makes conductivity testing a simple task. The portable and waterproof (IP67 rated) Horiba LAQUAtwin EC-22 conductivity meter can accurately determine water conductivity with a sample as little as 0.12mL, almost anywhere. However, to ensure precise conductivity measurements, the EC-22 must be calibrated periodically. Calibration is straightforward and takes only a few minutes.
Figure 1 Watch an Instrument ChoiceScientist condition and calibrate the Horiba Laquatwin Conductivity Meter here.
How to Calibrate the Horiba Laquatwin Conductivity Meter EC-22
You will need;
- Horiba Laquatwin Conductivity Meter EC-22
- Conditioning Solution
- 1413µS/cm conductivity solution
- 12.9 mS/cm Conductivity solution
Insert Batteries
If this is the first time using the meter, you will need to insert the batteries. With batteries installed, you can skip to Sensor Conditioning.
1. Flip the meter over, so that the LCD is facing down.
2. Lift the sensor tongue tip and slide the sensor away from the meter.
3. Insert the batteries, observing polarity.
4. Put the meter and sensor back together, ensuring to clip the sensor tongue tip back into place.
Sensor Conditioning
Before using the sensor for the first time or if your meter has been idle for several days, you will need to perform electrode conditioning. Otherwise, skip to Two-Point Calibration.
5. To condition, place a few drops of the conditioning solution into the measurement cell.
6. Close the protective lid.
7. Leave the sensor to condition for ten minutes.
8. After 10-minutes, clean the flat sensor in running water. If there is excess moisture, gently pat dry with a soft tissue.
|
IC TIP: For the conditioning, the meter does not need to be on, switch it off to conserve battery life. |
Two-Point Calibration
9. Press the power button to switch on the EC-22.
10. Open the protective cover and place a few drops of the 1413µS/cm conductivity solution onto the measurement cell.
11. Close the cover and press the CAL button.
12. ‘CAL’ and the smiley face will blink on the LCD, and the calibration buffer will be displayed.
13. After the calibration is complete, CAL and the smiley will stop blinking, and the calibration value at 25°C displays for 1-second. Then the screen automatically returns to measurement mode.
14. The first point of calibration is complete.
15. Open the sensor and remove the standard solution. If there is residual moisture on the sensor, remove by carefully dabbing with soft tissue.
16. To perform the second point of calibration, repeat the same steps as with the first point. Place a few drops of the 12.9 mS/cm conductivity calibration solution onto the cleaned sensor. The meter will automatically update the range from µS/cm to mS/cm.
17. Press the CAL button. ’CAL’ and the smiley face will blink on the LCD. The calibration buffer will be displayed.
18. After the calibration is complete, CAL and the smiley will stop blinking, and the measured value displays on the LCD for one second.
19. The second point of calibration is complete. Clean off the buffer solution and start taking conductivity measurements!
Conclusion
The Horiba LAQUAtwin EC-22 conductivity meter is straightforward to use and maintain. For accurate results, perform regular calibration and conditioning, as explained in the steps outlined above.
For more information on the Horiba Laquatwin series of meter, or assistance calibrating your EC-22, see the links below or contact us!
Additional links
- View the full features and specifications of the Horiba Laquatwin Conductivity Meter EC-22 here.
- Browse the extensive range of Horiba meters available at Instrument Choice here.
- Watch ‘How to Calibrate the Horiba Laquatwin Conductivity Meter EC-22’ again.
- Want to see what comes in the box? Watch an Instrument Choice Scientist ‘Unboxing theHoriba Laquatwin Conductivity Meter EC-22’.
Also interesting
The Salt11 is a portable, and compact salt meter that determines salt concentration utilising a unique ion-selective membrane. Samples can be placed directly on the distinctive flat sensor of the Salt11. This direct method simplifies the measurement process, saves time, and reduces sample waste.
To ensure highly accurate readings, you must calibrate the Salt11 periodically. This task takes under three minutes and dramatically increases the reliability of your salt concentration data.

The design of the EC-SaltTestr11 Waterproof salinity meter enables quick and accurate salinity measurements. This user-friendly meterguarantees years of trouble-free operation and requires very little maintenance. One critical step to keep this meter performing to the highest level of accuracy is to perform regular calibration. Thankfully, calibration of the EC-SaltTestr11 is an incredibly simple task that takes only eight steps.

