Minnow 1.0T & Minnow 1.0TH User Guide
Minnow 1.0T & Minnow 1.0TH User Guide |
1. INTRODUCTION TO MINNOW1.0 | ||||
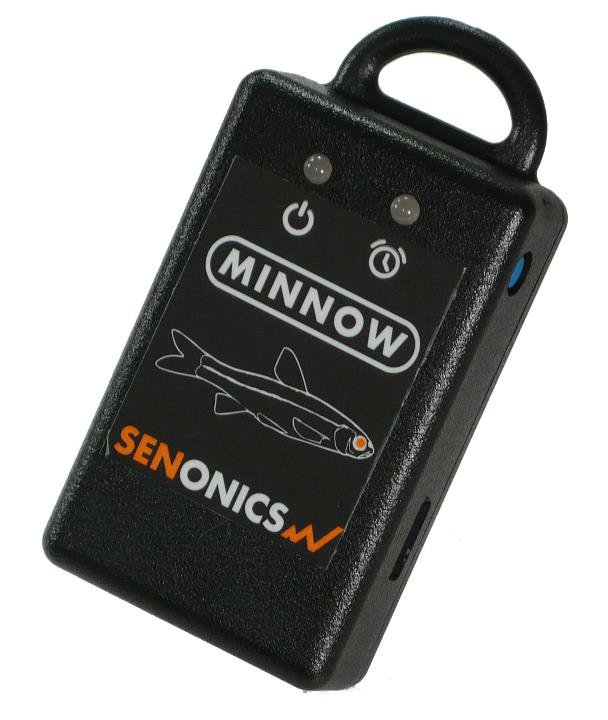 The Minnow1.0 logger is a high accuracy, compact, robust, temperature and humidity data logger measuring just 35mm x 60mm x 15mm. The logger comes with a free Windows and MAC application. This user guide provides basic information about how to use the logger and Windows/MAC applications. Both the logger and the applications have been designed to be intuitive so that you will be up and running with the logger in a matter of minutes. The Minnow 1.0 product today comes in two versions; Minnow 1.0T is a temperature only version and Minnow 1.0TH is a temperature and humidity logger. This user guide applies for both versions.
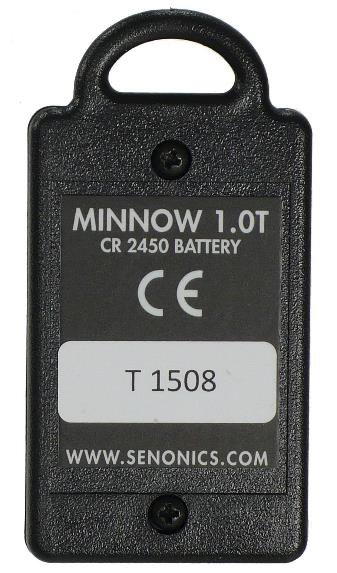
Figure 1: Senonics Minnow 1.0 | ||||
2. TECHNICAL SPECIFICATION | ||||
|
For a technical specification of Minnow 1.0T please consult the following product overview
http://senonics.com/files/MinnowT_Datasheet.pdf For a technical specification of Minnow 1.0TH please consult the following product overview. http://senonics.com/files/MinnowTH_Datasheet.pdf | ||||
3. USING MINNOW 1.0 | ||||
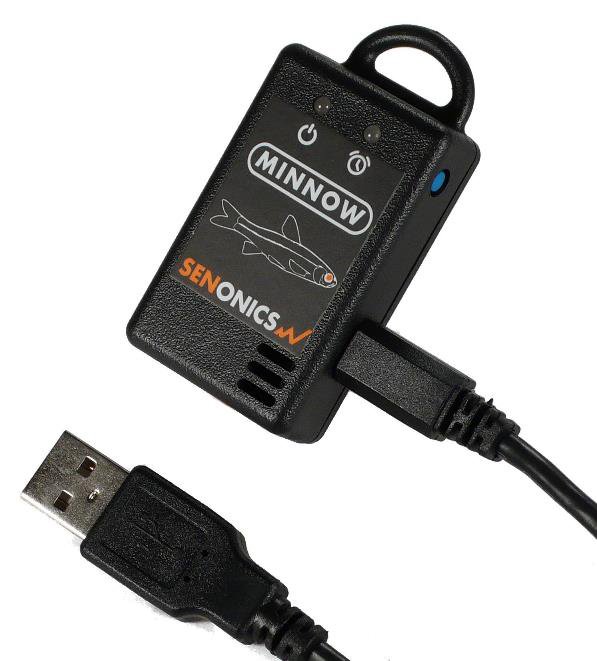
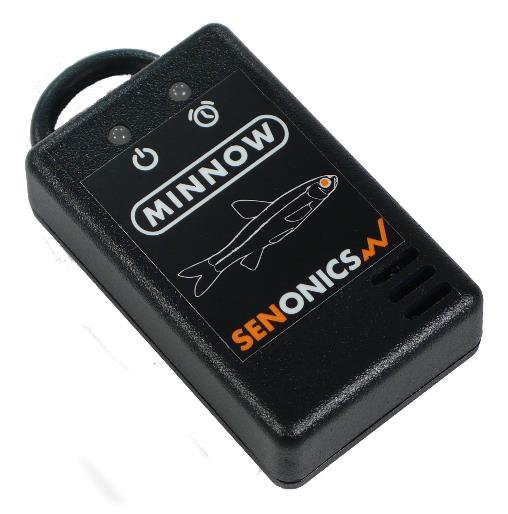
Minnow 1.0 logger includes one button: START button:When configured for "Button Press" logger start, this button starts and stops logging. In other configurations, this button is inactive. 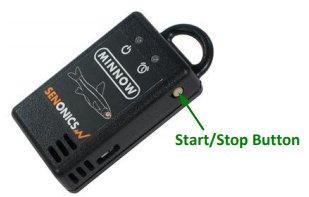 Figure 2: Logger Start/Stop Button Minnow 1.0 includes two LEDs: Status LED:When the logger starts logging then this LED pulses green once for 1 second. When logging this LED flashes green for 7 milliseconds and off for 6 seconds. When the logger stops then this LED pulses red for 1 second then off. Alarm LED: When a temperature and/or humidity alarm is triggered this LED flashes red for 7 milliseconds and off for 6 seconds. 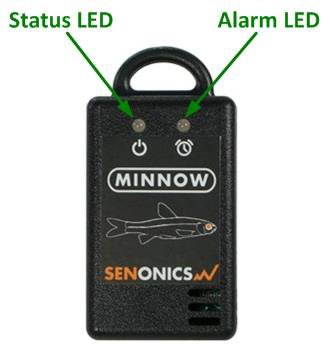 Figure 3: LED indicators | ||||
4. PC APPLICATION | ||||
Your logger may be controlled from a Windows PC or Mac from USB using a simple application. To install for Windows download:http://senonics.com/bin/SenonicsPCApplication_Installer.zip To install for Mac navigate to http://senonics.com/mac-installer.html | ||||
4.1. Senonics GUI Main Screen | ||||
The Senonics GUI includes a configuration pane, a graphical pane and a spreadsheet pane. Included also is a connection indication to signify connection or otherwise of a Senonics logger. 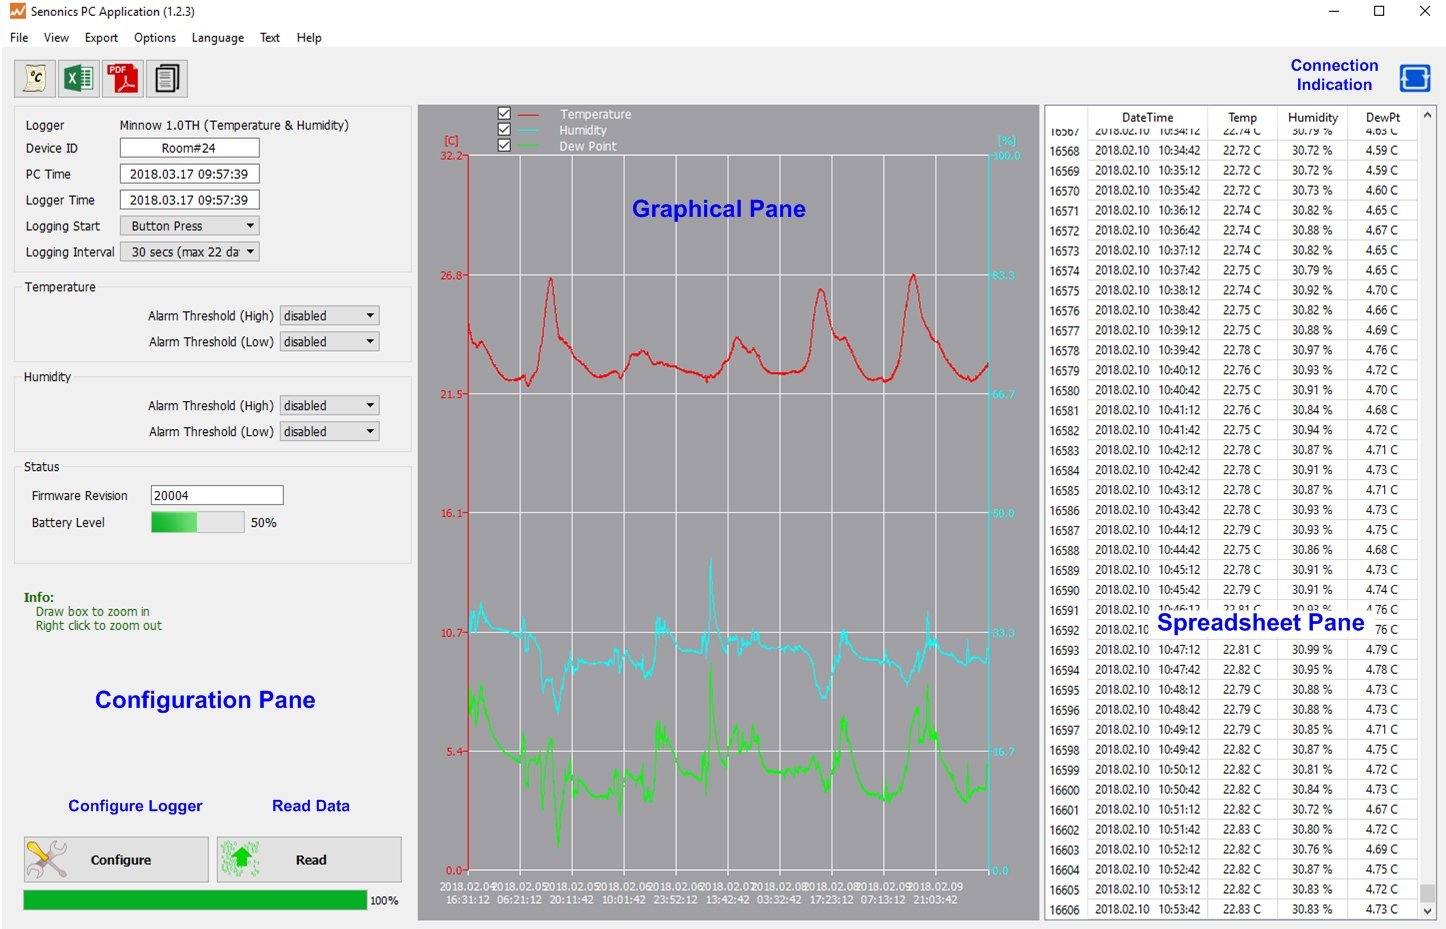 Figure 4: Senonics GUI | ||||
4.2. Configuring a Logger | ||||
Configuration of the logger is performed with the logger connected. Update all settings on the configuration pane such as logger name, logger start option (on disconnection, button press or at specified time), logging interval (1 second, 10 seconds, 30 seconds, 1 minute, 10 minutes, 30 minutes or 1 hour), temperature and humidity logging enables, temperature and humidity alarm levels. When complete press the configure button.  Wait for the logger to finish configuration (indicated by the busy indication disappearing).  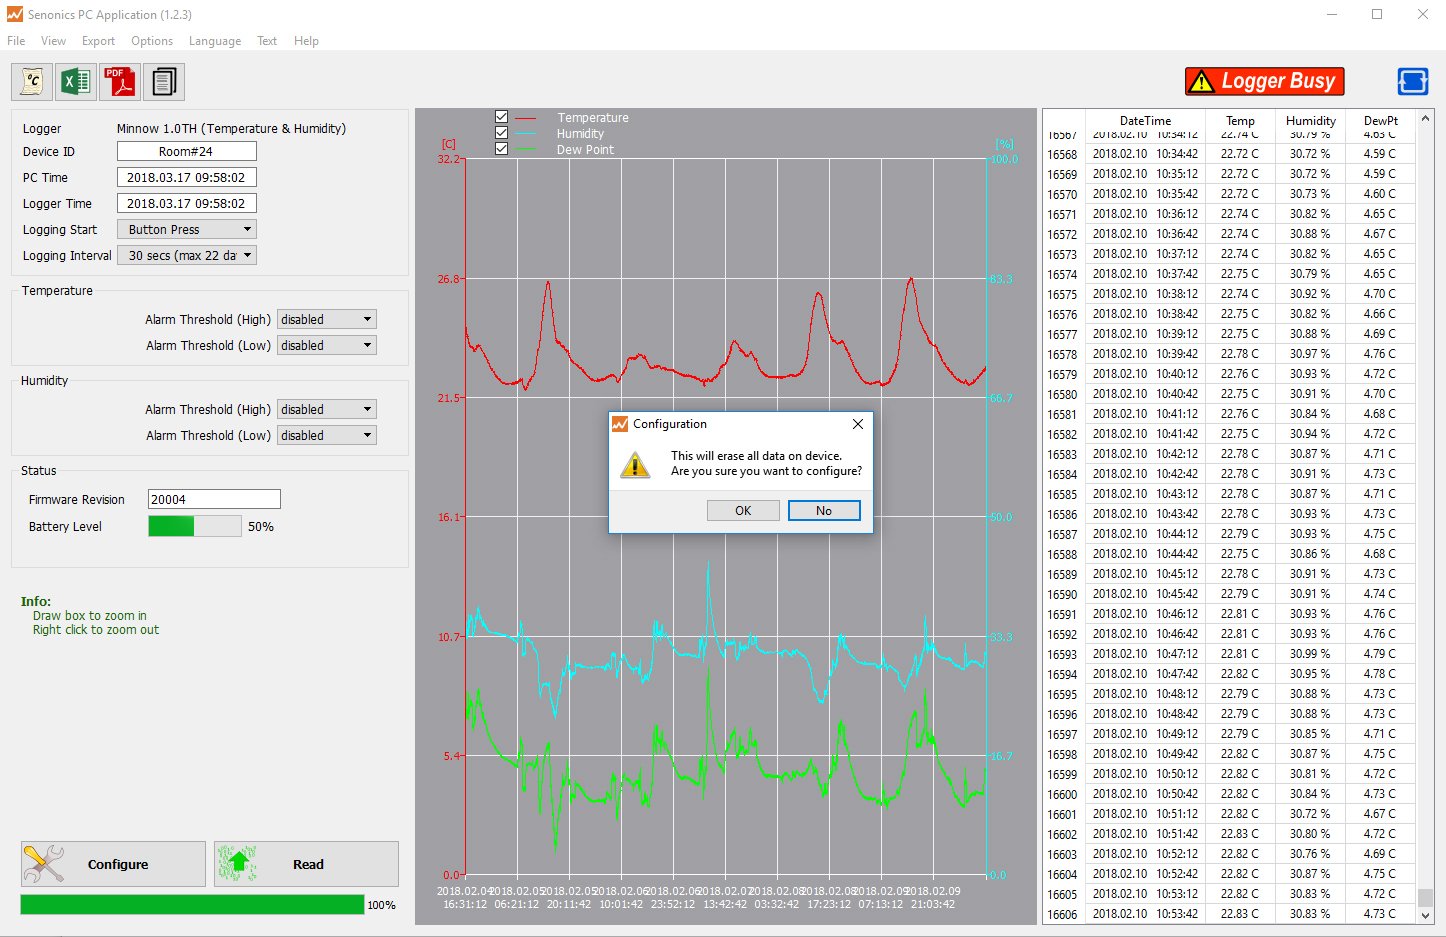 Figure 5: Configuration | ||||
4.3. Retrieving Logger Data | ||||
Data can be retrieved from the logger by connecting to the logger and then pressing the read button at the bottom left of the GUI. Both the device configuration and logged data will become uploaded and viewable in the configuration, graphical and spreadsheet views.  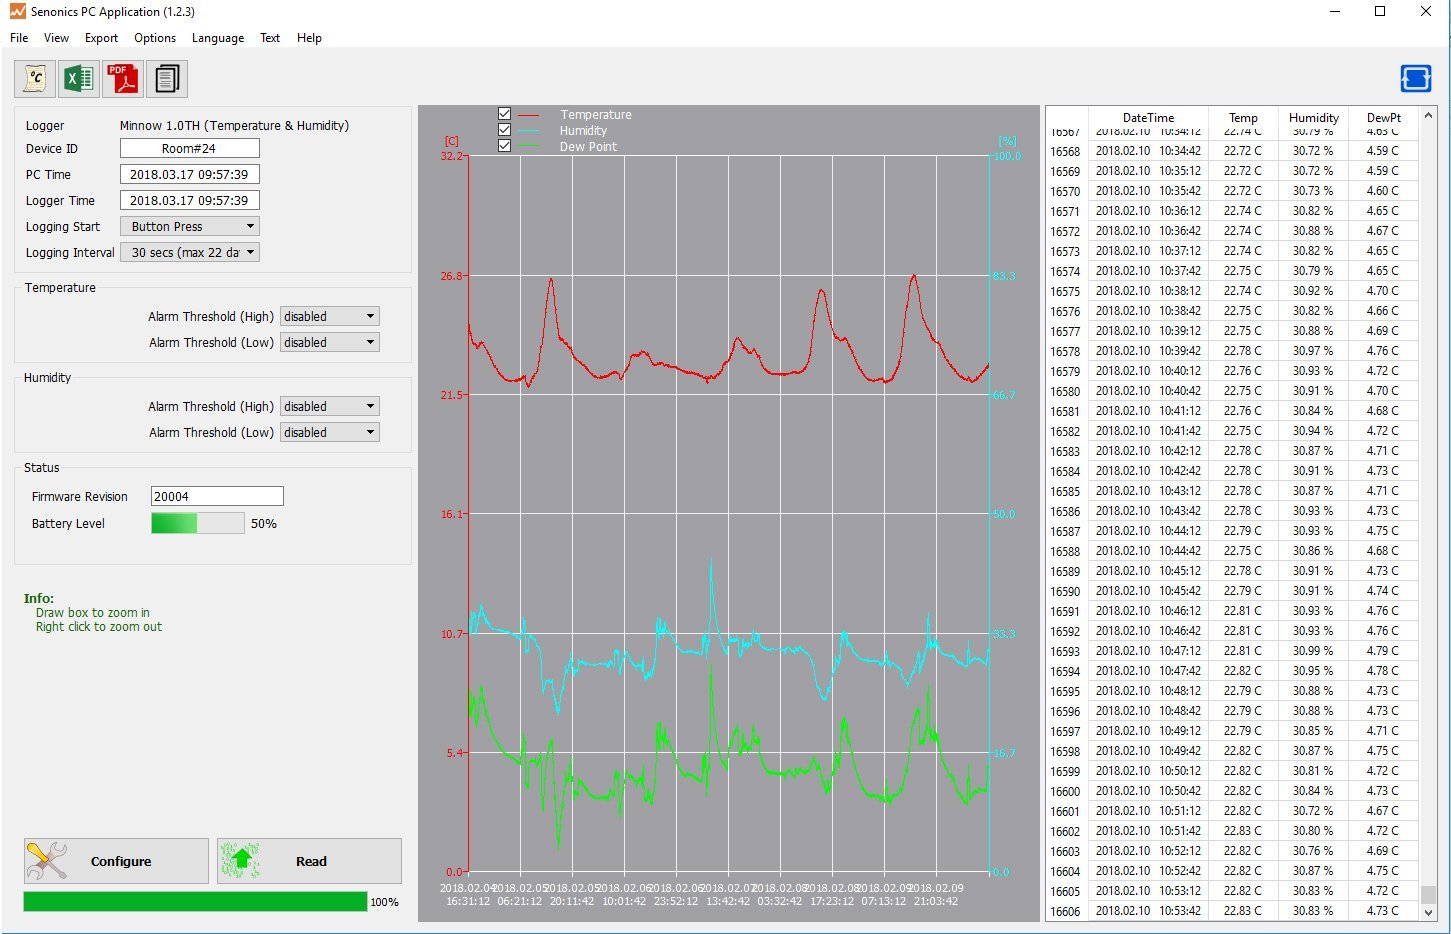 Figure 6: Retrieving Logger Data | ||||
4.4. Saving and Opening CSV | ||||
Logger data and configuration may be exported to file in Comma Separated Value (CSV) format. This format can be edited by third party software such as Microsoft Excel or read back into the Logger PC application at a later point. To write a CSV file navigate File>Save CSVTo read a CSV file back select File>Open CSV, and then navigate to the CSV file. | ||||
4.5. Cloning Loggers | ||||
For customers that expect to configure multiple loggers with the same configuration, Senonics offer the clone feature. First, press the clone icon or navigate File>Clone Logger.You are then presented with two copies of the configuration pane. Enter your configuration in the leftmost pane. When you are complete press the "Clone Settings" button. This will copy all settings across to the right-most pane. When you are satisfied press the "Lock Settings" tick-box. You can then connect loggers to your PC. When you press "Configure” the new logger is programmed each time with the same cloned settings. Be aware that the Device ID is not cloned, in order to preserve the logger identification. At any time, you can unlock, change settings and then lock again. 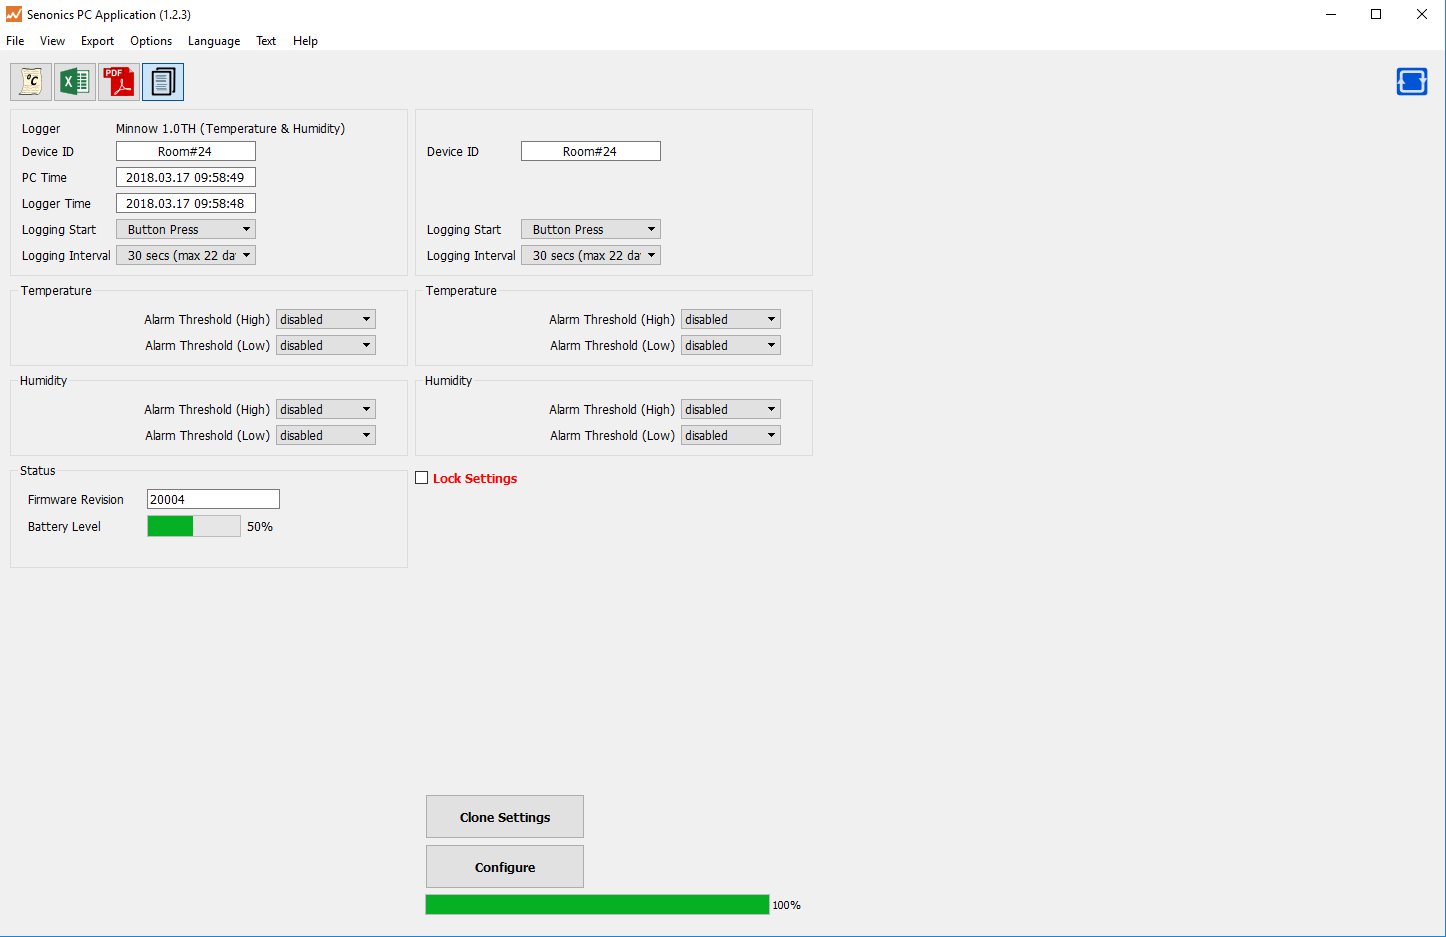 Figure 7: Logger Cloning | ||||
4.6. Auto Read to File | ||||
Some customers like the ability to be able to connect a logger and automatically download and save data to file. Select Options>Read and Save Options.You are then presented with three options:
In saving to file you can change the order of the date, time and logger ID as they appear in the file name. 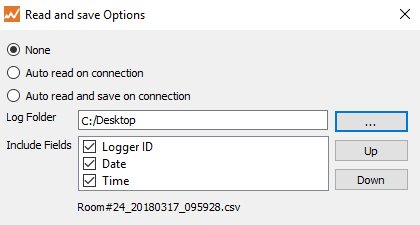 Figure 8: Read and Save Options | ||||
4.7. Opening Excel | ||||
| It is possible to press the Excel button or navigate Export>Open Excelto show the data in Microsoft Excel. During this process the user needs to select if your version of Excel is expecting and "." or "," to represent the number decimal point. This capability assumes that Microsoft excel is installed on your PC. If not, then the option will not work. This option is not available on the Mac version of the GUI. 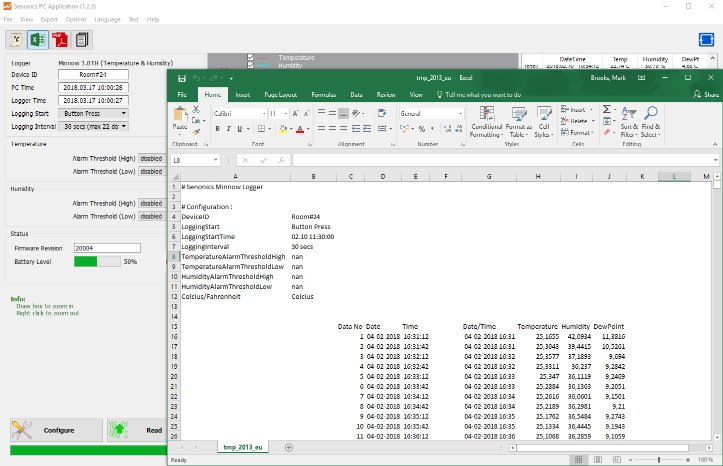 Figure 9: Opening Excel | ||||
4.8. PDF Reports | ||||
| Open a one-page PDF report by pressing the PDF icon or navigating Export>Save PDF. A PDF is written to summarize the data in the logger by way of statistics and as a graph. The PDF can be written either in US Letter page size of A4 page size. The user can enter one’s own notes at the footer of the PDF. PDFs are written to file and can be opened by any standard PDF reader – like Adobe Acrobat. 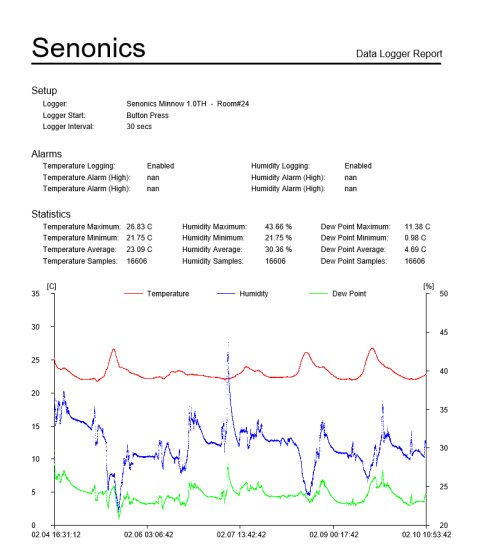 Figure 10: Writing PDF Reports | ||||
4.9. Text Size | ||||
It is possible to change the application text size by selecting from the Text pulldown on the program header. The Auto setting selects one of the sizes based on screen resolution. When the application reopens, text size is remembered. 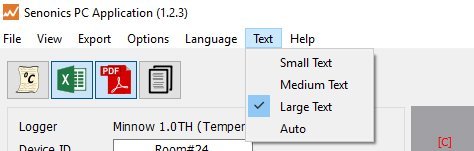 Figure 11: Altering Text Size | ||||
4.10. Language | ||||
The GUI application comes with language translation. Today one can select between English, German and Danish from the Language pulldown on the program header. Future versions will support more languages. When the application re-opens, language preference is kept. 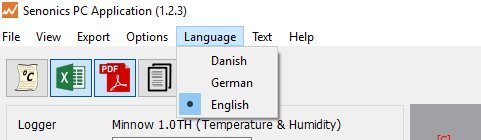 Figure 12: Language Preference | ||||
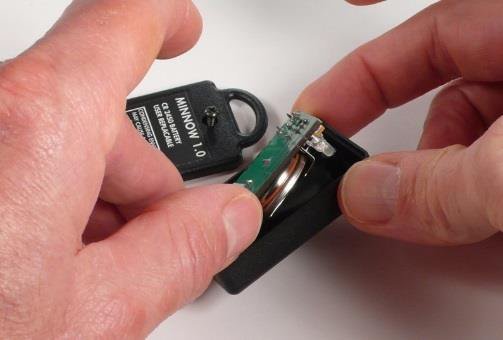
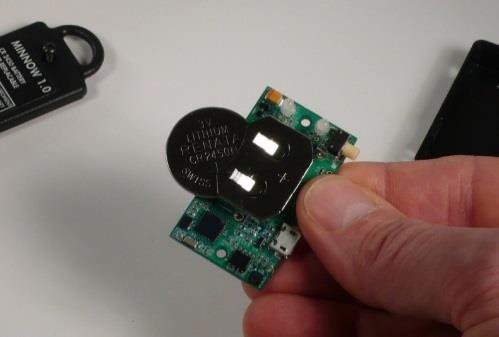
5. BATTERY REPLACEMENT | ||||
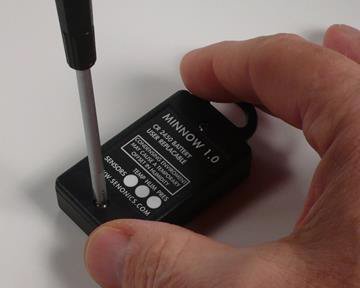
The Minnow 1.0 logger runs from a standard coin cell battery. We recommend a CR2450 620mAH coin cell battery. There are different manufacturers but a good one is Panasonic CR-2450/G1AN. You can find it easily on the web from different places such as www.digikey.com, www2.mouser.com and probably in your local supermarket. The key thing is to choose a CR2450 battery with high capacity since this will translate into a longer logger battery life.
Figure 13: Minnow 1.0 Battery Replacement | ||||
6. MOUNTING GUIDELINES | ||||
There is no particular limitation with regard to transporting your data logger. The logger may be fastened to a transportation container or loosely packed. It is recommended however to keep some air space around the ventilation slots on the logger or else the logger may take longer to track humidity and temperature changes. | ||||
7. SUPPORT | ||||
For technical support regarding your Senonics logger please contact: [email protected] | ||||