How to cool a beer in under 6 minutes, our experiment. Also information on how to select a rotating laser level.
How to cool a beer in under 6 minutes, our experiment. Also information on how to select a rotating laser level. |
Instrument Choice would like to wish everyone a Happy New Year and a wonderful start to 2015. We are looking forward to the year ahead and continuing to support our customers in all areas of Scientific and Environmental Instrumentation. If you need any assistance with selecting the right instrument for your project please contact one of our friendly Scientists via email or phone on 1300 737 871. The Beer Experiment Revised!In March of 2013 we investigated the fastest way to cool your beer, this month we are revisiting this experiment using the salt/ice water slurry (fastest method from the March experiment). However, we are mixing up by seeing if there is a difference in the time taken to cool if the type of container (glass vs aluminium) or type of beer (stout, mild and draught) is used. Read this month's experiment below to find out what happened! How do you go about selecting a rotating laser level and what some important considerations?With the weather fining up and the New Year under way we have had a number of enquiries regarding rotating laser levels and what you should consider when purchasing. So this month we will cover off on the most important considerations to ensure you select the right option for your requirements! | |||||||||||||||||
 Does the type of container or the type of beer affect how fast it cools?Back in March 2013 we investigated the fastest way to cool a beer and we found that an esky filled with an ice, water and salt slurry did the job the fastest. This month we are going to test whether beer type, or the container (glass bottle or aluminium can) has an effect on the speed of cooling. | |||||||||||||||||
Equipment
Method A salt water slurry was created by dissolving as much salt as we could in 2 litres of water. The foam esky was then filled with ice, and the salt water mix was poured over the ice to reach approximately a 50:50 salt water/ice mix. The IC7209 thermometer was used to check the temperature of the slurry which was found to be -15.5C. Super thermocron loggers were then setup using the eTemperature software to record readings every 30 seconds. The loggers were then placed in the beer cans and bottles attached with fishing line to suspend them in the middle of each container and they were left to stabilise. The beer bottles and can were then placed in the esky and left for approximately 30 minutes. After 30 minutes the dataloggers were removed and the loggers were downloaded onto a computer and the data was exported to Excel for further analysis. 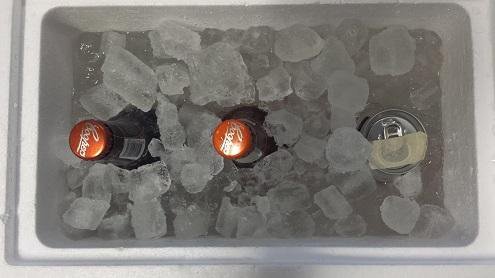 Figure 1: Foam esky with salt/ice slurry with beers and loggers submerged Results 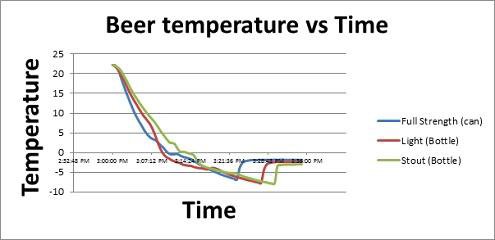 Figure 2: Graphical representation of the time taken for the beers to cool The graph shows that the beer in the Aluminium can was the quickest to get to 5C and reached this temperature within 6 minutes of entering the esky. The beers in the glass bottles took 8 minutes (for light beer) and 9 minutes (for stout) to reach 5C. Interestingly the light beer then seemed to speed up and reached 0C at 9 1/2 minutes and the beer can reached 0 at 10 minutes and the Stout reached 0C at the 12 1/2 minute mark. Each beer then froze when they got to around the -7C mark which took 23 minutes for the beer in the aluminium can, 27 minutes for the light beer and 30 minutes for the stout.
Figure 3: Showing the respective time taken for the types of containers and types of beer to cool to certain temperatures Discussion and Conclusion These results show that if you want a cold beer quickly and you have warm beers in cans and in glass bottles then you should choose the beer in the aluminium can as it will give you cool beer 2 minutes faster than bottled beer. If you are happy to wait, then using the salt water ice slurry will cool any 375ml beer to a drinkable temperature within 10 minutes. | |||||||||||||||||
 The questions to ask when you are looking to purchase a rotating laser level!Indoors or Outdoors?The first and most important consideration when selecting a rotary laser is to know laser level will be predominately used indoors or outdoors or a combination of both. If you are looking to use the level for interior construction then use a level tool with a highly visible beam, the most suitable being either a ~635nm red laser or 530nm green laser. For outdoor use a receiver will need to be used, as even a highly visible green laser will be impossible to view in daylight. An interior laser should also offer a variable rotation speed or beam scanning to maximise visibility. | |||||||||||||||||
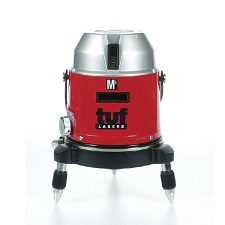 4 vertical, 360 degree horizontal auto cross line laser kit - An ideal unit for indoor measurements | 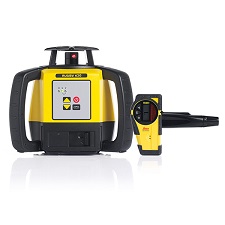 Rugby 610 with Basic Receiver - A good starting laser level for outdoor use | ||||||||||||||||
| What accuracy do you require for your application?
Lower end lasers start on the lower end of accuracy and have an accuracy of ±3mm at 30m. This increases to as fine as ±1mm per 30m for high end units. The error of a laser increases with the distance from the receiver. If a laser’s accuracy is ±1mm at 30m, it is ± 2mm at 60m and ± 4mm at 120m. So, for the highest degree of accuracy you want to work as closely as possible to the laser level. | |||||||||||||||||
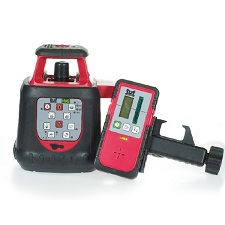 Horizontal & Vertical rotation green laser with dual axis manual grade - Lower accuracy unit with an accuracy of ±3mm at 30m | 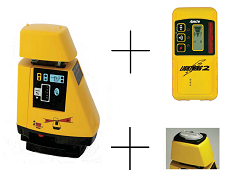 Proshot AS2 Magnum with R8 Receiver - High accuracy unit with an accuracy of ±1.5mm at 30m | ||||||||||||||||
| Do you want to be able to project a slope?
High end construction levels feature the capability to dial in a slope in increments of 0.01% or better, this is ideal for applications such as storm sewers or airport runways where a high degree of slope accuracy is required. For less precise applications such as drainage ditches or drive ways a large array of rotating laser levels offer manual slope in either a single or dual axis. | |||||||||||||||||
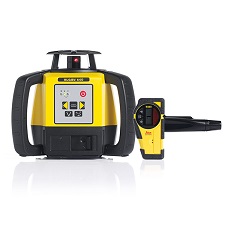 Leica Rugby 640 - Capable of manual slope in dual axis | 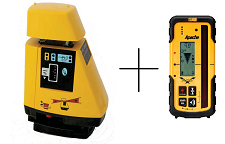 Proshot AS2 With Storm Receiver - Dial in grade up to 25% in 0.01% increments | ||||||||||||||||
| Do you need any additional features such as vertical alignment or 90° plumb spot?
When you need to perform layout and alignment tasks that go beyond basic levelling, then there are a variety of lasers with additional features available. There are models available with a plumb laser spot that forms a 90° reference to the plane of laser light. That 90° reference can be used for square layout, or to transfer single points up and dead vertical. This can be really handy in indoor applications such as light points. There are also laser levels capable of projecting a vertical plane of laser light for layout, or plumb alignment. Laser levels are great for starting from base lines or layout points and transferring them to a ceiling, or upper floor. | |||||||||||||||||
If you need any assistance selecting a rotating laser level for your requirements please feel free to contact one of our friendly Scientists via email or phone on 1300 737 871. | |||||||||||||||||